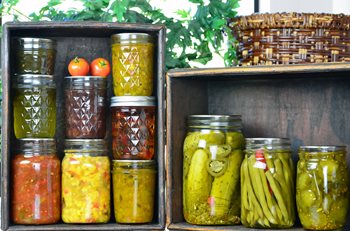
The leaves are changing, the temperature is dropping and our allergies are kicking into high gear—yep, it’s officially fall. While we’re excited to trade in our summer wardrobes for cozy sweaters and hot chocolates, this change of season presents a big dilemma: How will we preserve our fresh food?
As much as we hate to admit it, fall’s cooler weather means winter is quickly approaching with even colder weather that will prevent our fresh food from growing. But don’t panic. We’ve got the secret to keeping all of your garden fruits and vegetables fresh until winter, and it comes down to two words: canning and freezing.
What is canning?
Canning is a way of preserving your food by sealing it into an airtight container. This allows food to maintain its flavor and stay safe to consume anywhere from one to five years, depending on the type of food. (For example, soup can last up to one year when canned.)
What is freezing?
Freezing is another way of preserving your food, but it requires a little less effort than canning. By lowering the temperature of the food—usually by utilizing a personal freezer—food can stay good and fresh for months or even a full year depending on the type of food you’re freezing. (Sticking with the previous example, soup can last up to six months when kept frozen.)
So, where do I start?
First of all, there’s no right or wrong answer for whether you should can or freeze your food, as it really depends on personal preference and the type of food being preserved. If you’re looking for a specific, in-depth guide on how best to can or freeze specific foods, visit the
National Center for Home Food Preservation, and your prayers will be answered (seriously, this team really took their time here).
If you’re looking for quick tips and tricks for how to utilize canning and freezing to preserve those summer fruits and veggies until winter (which we know you are), keep reading.
Canning supplies:
The basic tools you’ll need for canning include:
- A canner (similar to a huge pot)
- A funnel
- A jar lifter*
- A jar rack
- A bubble remover and head space measuring tool
- Jars (specifically made for canning), lids and rims
(*This item isn’t necessary, but some canning experts recommend it.)
Canning steps:
- Once you have all of the necessary materials and have washed your jars, lids and rims, put the jar rack in the canner, add water to the canner (about 1-2 inches above the jars) and bring that water to a boil.
Note: Each recipe will require a different amount of boiling time for the jars.
- Take the jars out of the canner (using a jar lifter if you’d like), and fill the jars with your desired food using your funnel.
- Using the bubble remover and headspace measuring tool, make sure you have enough headspace (space in between the food in the jar and the lid) and remove any air bubbles.
- Clean the rims of the jars so as not to have anything to prevent the jars from sealing.
- Place the lids on the jars and tighten the rims on the jars.
Note: Only tighten them until you first feel resistance. Do not over-tighten.
- Place the filled jars back into the canner (using a jar lifter if you’d like).
- Make sure the water is returned to a full boil and continue for the recommended amount of time.
Note: Boiling time will vary depending on the type of food being preserved.
- When the jars are finished being processed, let them cool in the canner for a few minutes.
- Remove the jars with the jar lifter and let them cool for 12-24 hours.
Note: You do not need to retighten the rims. The “pinging” noise you may hear is the sound of the lid going concave and becoming airtight.
- Once the jars have cooled, check the seals by pressing the center of the lids. There should be no give.
- Note: If the lid gives in to your finger, the seal isn’t good and the jar must be refrigerated to use soon or it must be frozen.
- Store your jars in a cool, dark place.
- Enjoy!
Freezing supplies:
The basic materials you’ll need for freezing food are:
- Common kitchen and meal preparation utensils
- Freezer containers (e.g. freezer safe jars, plastic freezer bags, etc.)
- Food/recipe ingredients that will be preserved
Freezing steps:
- Once you have gathered the necessary materials and equipment, make sure you have the right storage containers for freezing your food.
Note: More rigid containers are best for liquid foods, and more flexible containers are best for solid foods.
- Place the food into the appropriate freezer containers.
- Store your food in a freezer at around zero degrees Fahrenheit for the recommended length of time.
Note: Several fruits and vegetables are best frozen after blanching (placing food into boiling water for a select amount of time before being placed under ice water to halt the cooking process).
Note: For rigid containers (with liquid food), leave around one-half inch of headspace to allow the food to expand.
Note: The recommended length of time will vary depending on the type of food.
And there you have it! You now know how to prepare and keep those summer fruits and veggies good until winter. Remember, just because the season changes doesn’t mean all of your fresh food has to go to waste. Save your food and save your money by canning or freezing your perishable foods.